


|
Dans' Eagle Project
Dan decided for his Eagle Project, that he wanted to build a gazebo in the park down
the street from us. A few years before,they had added a swingset and play area. There was
no place to sit. He decided, he wanted to correct that situation.Through the course of the project, he has learned about planning, working with City Committees. He has had to do his own fund raising, set up a checking account for the project. He went to multiple stores to get estimates for his materials, ordered and paid for all of the materials, and had to handle returns of materials not needed. This has been an amazing learning experience for him. | ||
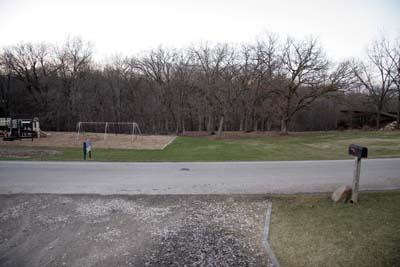 |
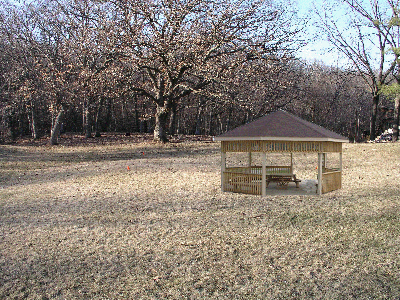
This is the park before any work has started | |
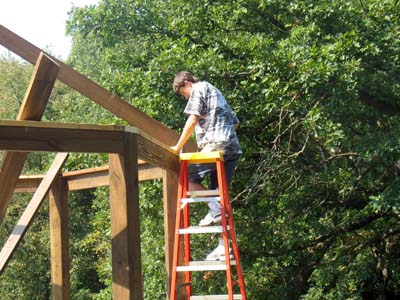
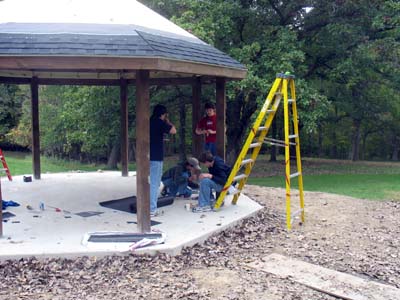
| Dan working on the planning. He had planning, meeting with the Director of Leisure Services, and meeting with 4 different Waterloo Committees before he could move forward. |  |
|
 |
He over 100 hours of planning and fund raising prior to starting any construction. Through generous donations, he was able to raise about $2200.00 prior to starting his project. | |
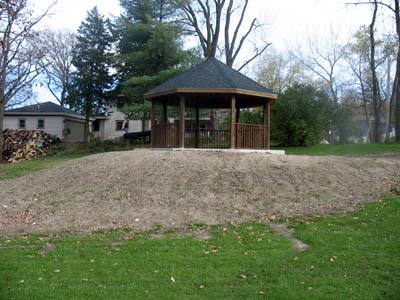
| Prior to construction, the city added a little dirt for the project. | 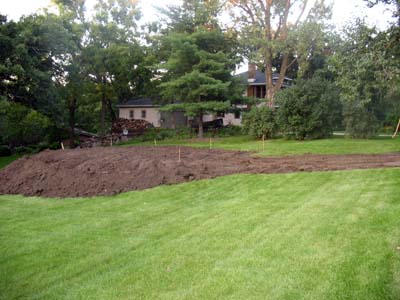 |
|
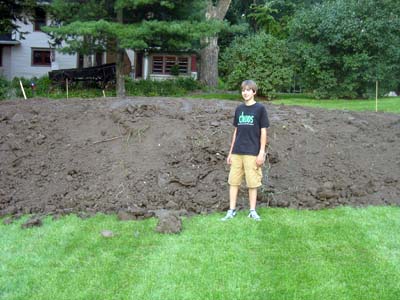 |
This really is the amount of dirt they added! 42 inches! | |
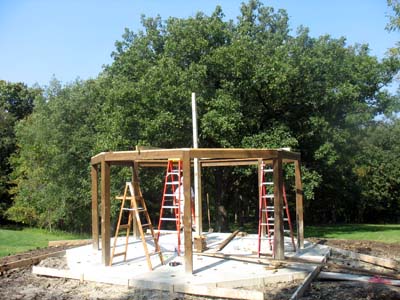
| Batter boards were placed to get the layout of the gazebo. | 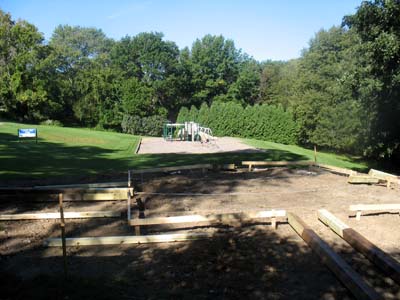 |
|
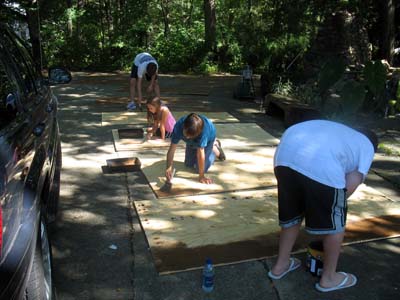 |
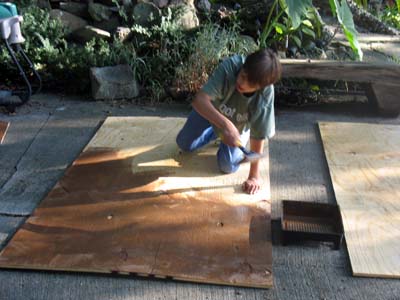
Dan and some of his friends spent an afternoon staining a LOT of wood! | |
| 24 sheets of plywood | 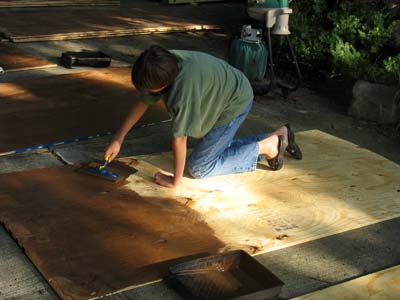 |
|
 |
8 posts and 40 pieces of wood, to start with . . . | |
| After the holes were drilled, the posts could be placed. | 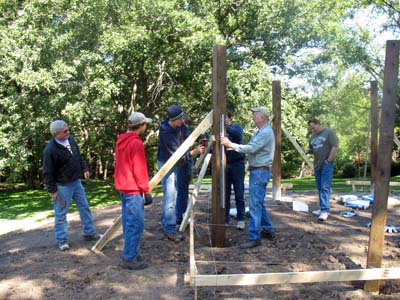 |
|
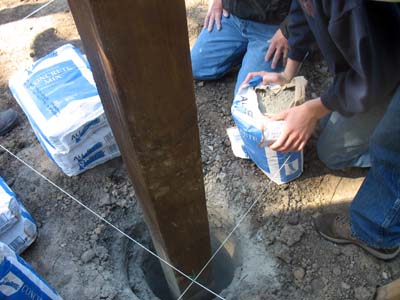 |
65 60lb bags of concrete went into all of those holes! | |
| The end of the first day. The posts are in place and braced. | 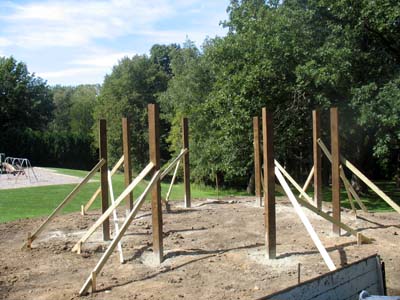 |
|
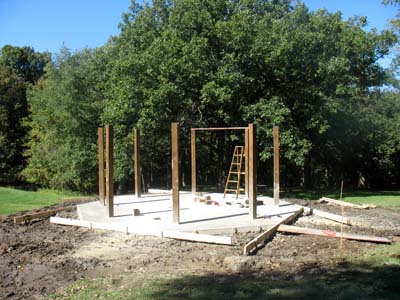 |
Dan was fortunate enough to have a company donate the labor to lay the forms and pour the concrete slab. | |
| Using a sawzall, the posts were all made even to the cement slab. | 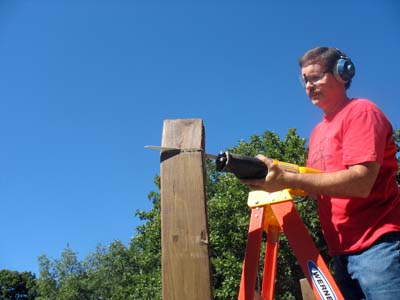 |
|
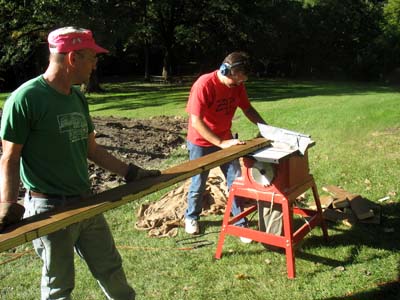 |
Greg and Byron cutting one of many boards that day. | |
| Byron watches intently as the board gets cut |  |
|
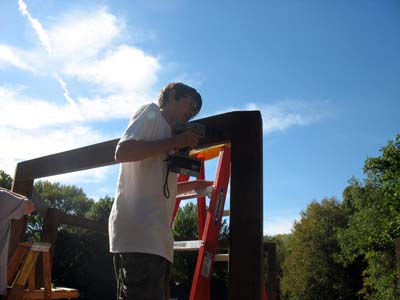 |
Dan secures one of the header boards. | |
| Sam and Dan show off their power tool skills they learned in shop class. | 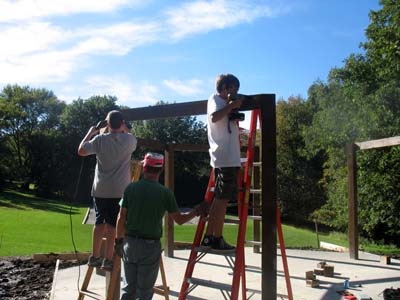 |
|
 |
Dan supervises as Sam screws in place the header board. | |
| The days work almost done. | 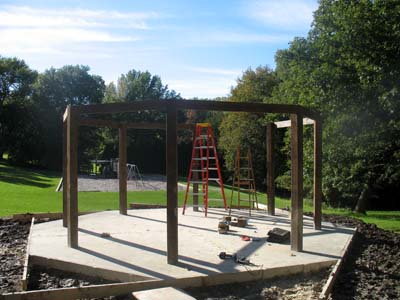 |
|
 |
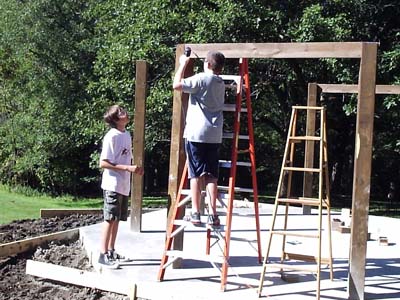
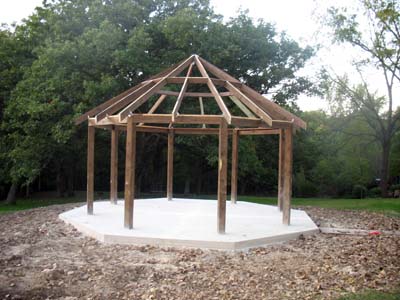
Starting to look like a gazebo. A lot of work done, and a lot to go. | |
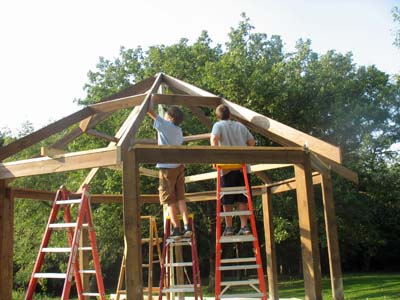
| The following day. The plan - put up the rafters. | ||
| The 12 foot support post was not tall enough for the pitch of the roof. A little extra wood, a few nails and screws and a rig was created. |  |
|
 |
The support post in position and braced | |
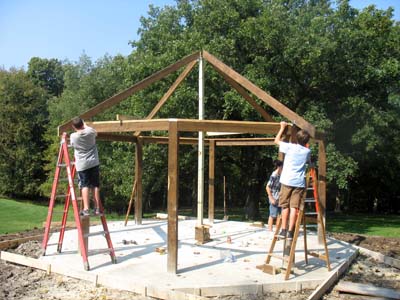
| The first rafters go up | 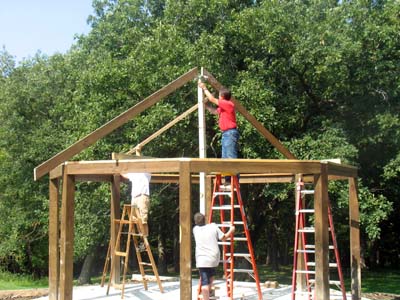 |
|
 |
Dan and Sam start putting in the hurricane braces. Not sure when the hurricane hit Iowa, but we'll be ready. | |
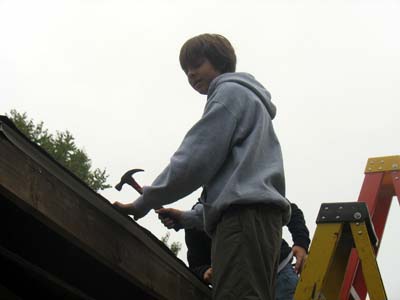
| Michael shows off his hammering skills. | 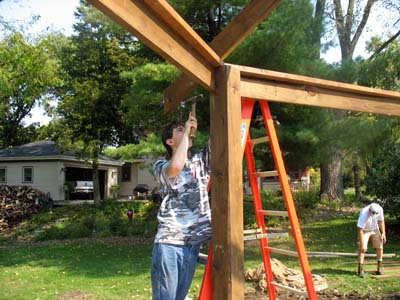 |
|
 |
Working on another brace | |
| The metal center housing was a huge time saver. | 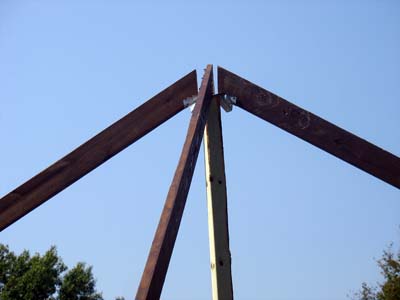 |
|
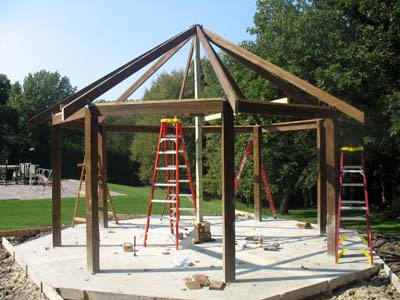 |
It's coming together. All the rafters in place. | |
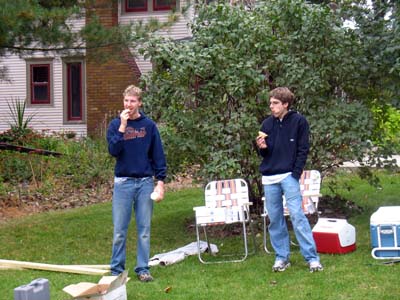
| Lauren supplied the food. Homemade muffins and brownies! Along with lemonade, what more could you want? | 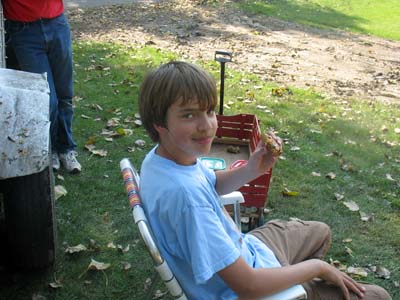 |
|
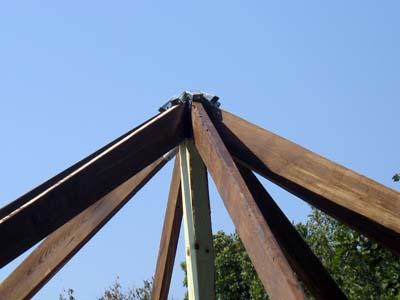 |
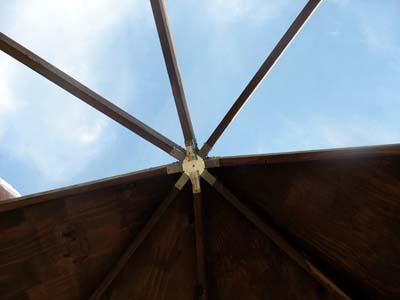
The metal hub. The top still has to be screwed in place, but the rafters are snuggly inplace in the bottom. | |
| Dan and Sam put in the last few screws in the cross braces. |
 |
|
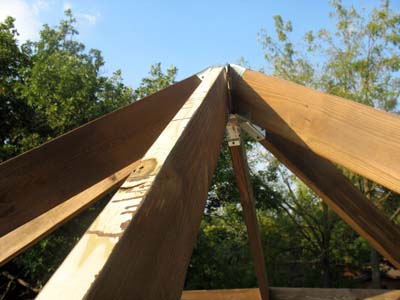 |
Dan has an interesting shot looking up a rafter toward the hub. | |
| Dan shows some of the cross braces | 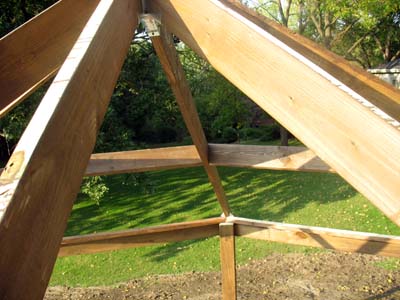 |
|
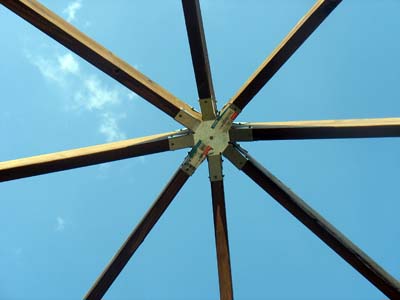 |
The finished hub | |
| Final cleanup on Day 4. | 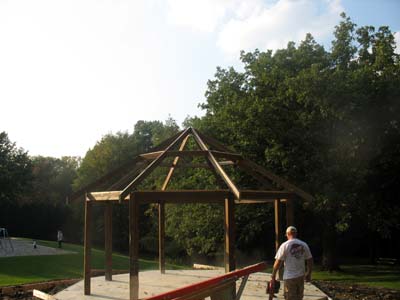 |
|
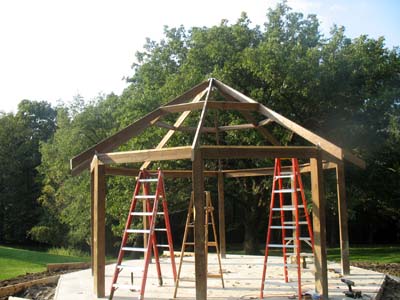 |
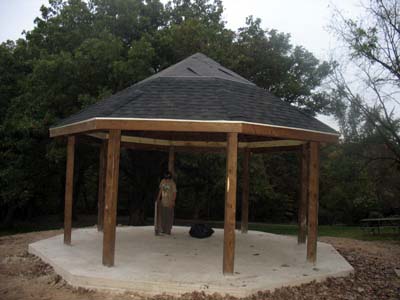
The end of day 4. The rafters and cross braces are in place. | |
| The short rafters have been added | 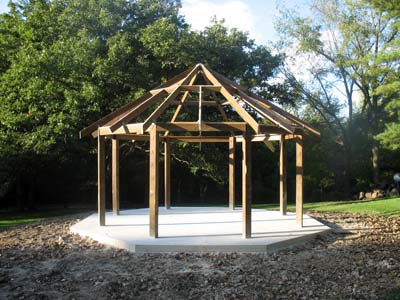 |
|
 |
All the rafters have been cut down to be equal in length. | |
| Looking from the east toward the playground in the park | 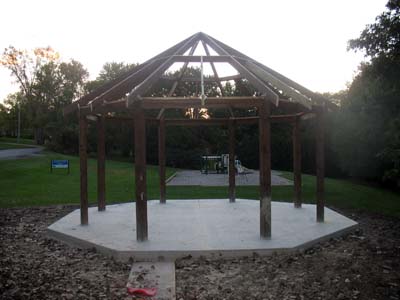 |
|
|
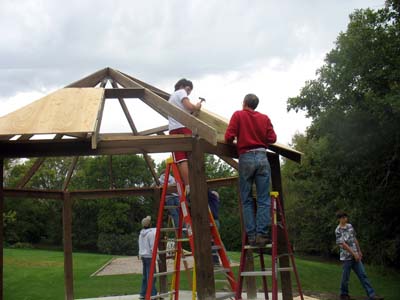
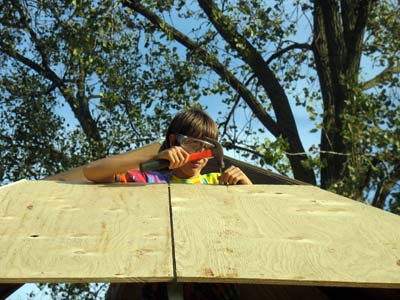
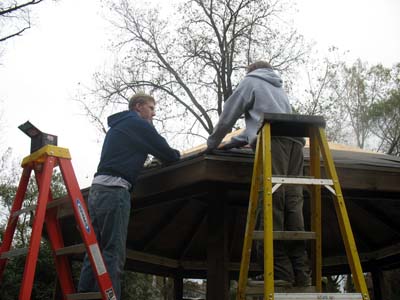
The goal today, get 24 sheets of plywood on the rafters. Every sheet has at least 3 cuts and angles. | ||
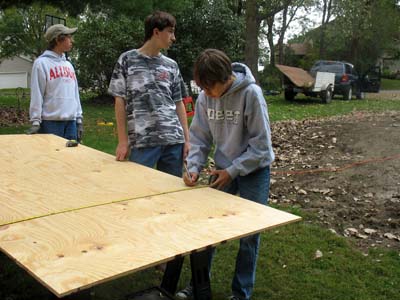 |
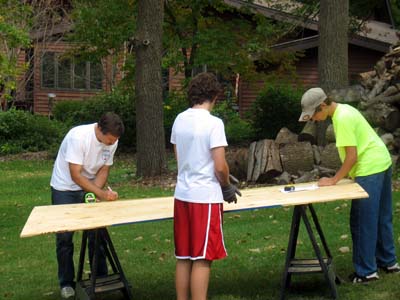
The scouts transfer measurements to the plywood | |
| Double check the measurement. Measure twice, cut once . . . (at least in theory) | 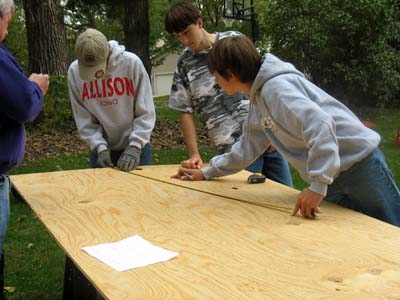 |
|
 |
One of the first panels goes up | |
| Doug and Dan check the bottom measurement | 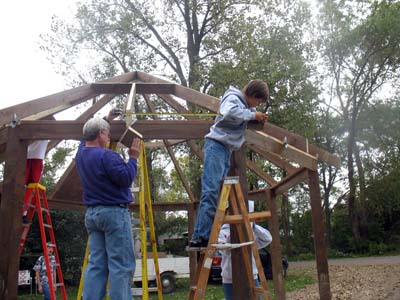 |
|
 |
An hour into working, the sky looked threatening. We only had about 10 minutes of sprinkles and then the sun came out. | |
| Dan and Chris finish nailing a panel |  |
|
 |
More measurements and more wood | |
| After all 16 lower pieces were nailed in place, the top triangles were next. | 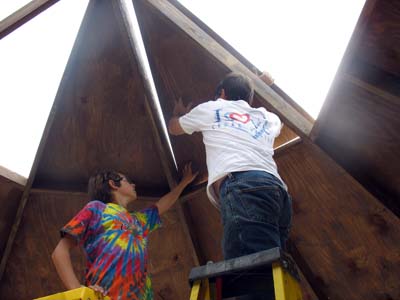 |
|
 |
Greg tries to reach a far corner to nail | |
| Sam being intense | 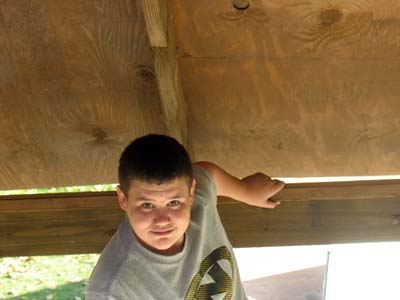 |
|
 |
Half of the triangles in place | |
| The front all done | 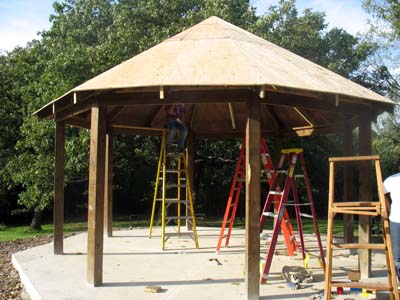 |
|
 |
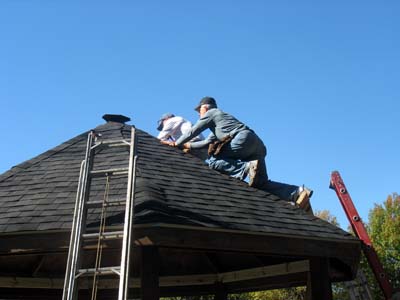
Dan nailing the top edge | |
| Greg attempting to fall off the roof. Finishing up the last piece. That roof is much steeper and slicker than it looks | 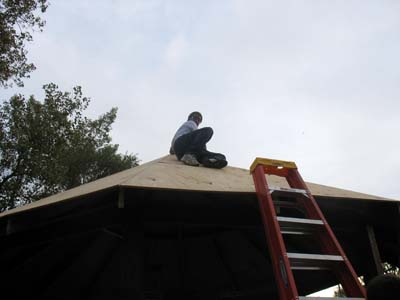 |
|
 |
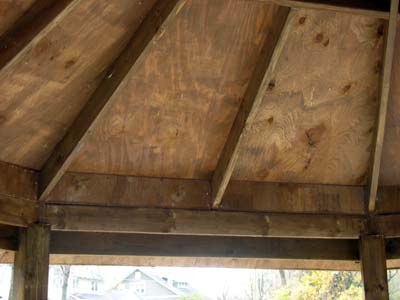
The end of day 5. All of the roof is in place. A few odds and ends left, but mostly done and looks great. | |
| The fascia in place | 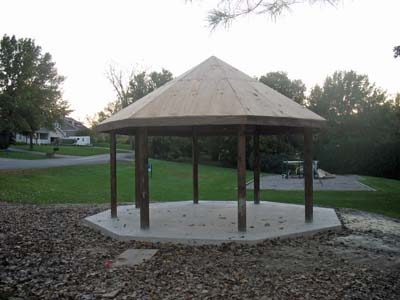 |
|
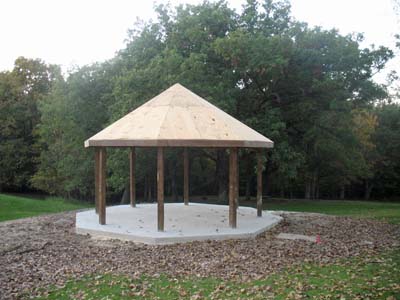 |
The fascia really cleans up the appearance. Ready for shingles. | |
The plan - put on roofing felt and shingles | ||
| The lower layer of roofing felt is in place. Dan and Carson putting down the starter layer of shingles. | 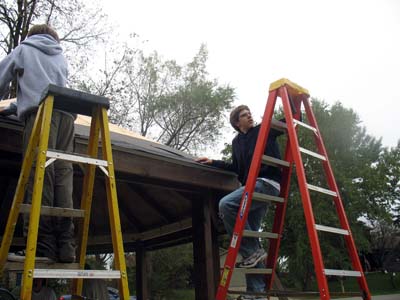 |
|
 |
Dan and Ben work on a corner shingle. The shingling was very slow as no length was more than 3 shingles wide before you had to cut a shingle. The scouts did a great job putting down shingles. | |
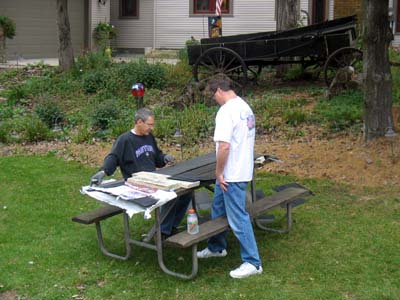
| Jerry and Chris - the official shingle cutting crew. They precut series of shingles so we could put down several rows at once. | 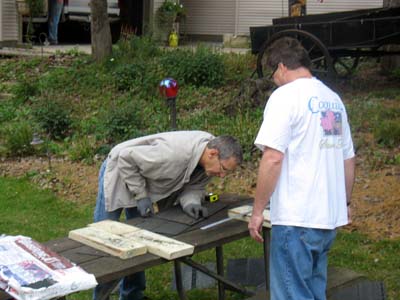 |
|
 |
Dan wielding his hammer with care. | |
| Dan and Carson working. | 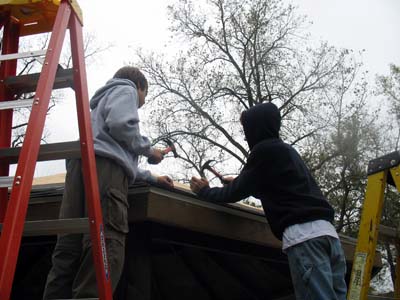 |
|
 |
Chris and Jerry plan their next cuts. | |
| Dan and Steven put down the next row of roofing felt. The hammer stapler was one of the more popular tools. Everyone wanted to use it. | 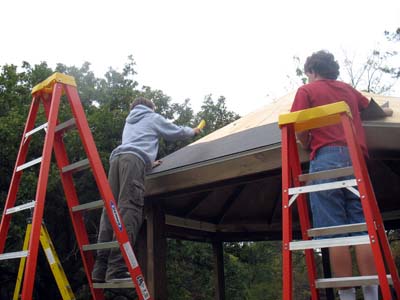 |
|
 |
Ben and Carson take a well deserved break. | |
| Lynnette brought out lunch for the crew. Sloppy Joes, chips, juice, and cookies. |  |
|
 |
Some of the scouts taking a break for lunch. | |
| The roof starting look good as more rows of shingles go up. | 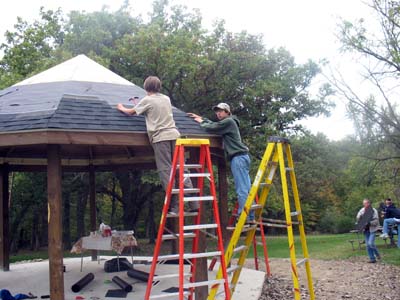 |
|
 |
Michael, Carson and Steven cut some of the three tab shingles to use as roofing caps. | |
| All of the roofing felt is in place. The roof is steep enough that roof jacks are a good idea. Greg putting up more rows of shingles. | 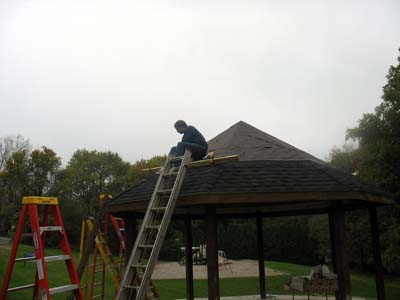 |
|
 |
The end of the day. Not done, but over half way there and looking good. The scouts can be proud of the job they did! | |
|
Sunday it rained all day, so we couldn't work. | ||
| Steve and Tom working on the cap shingles | 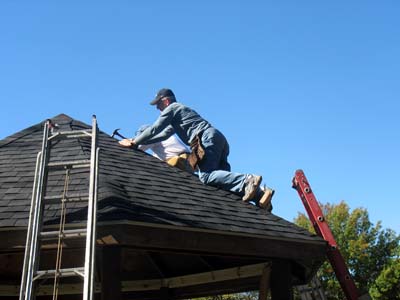 |
|
 |
Almost done. With 4 of us working, it didn't take too long to finish the last few rows of shingles and put up all of the roof caps. | |
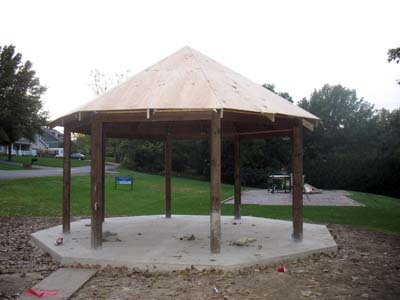
| The finished roof. It's really coming together now and looks great! | 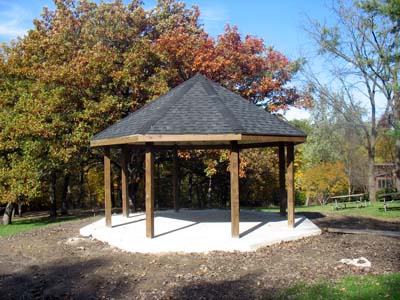 |
|
 |
The project is nearing completion. The overhang needs to be covered underneath and the railings built and installed. | |
| Glen and Greg worked on enclosing the overhang inside and out - so birds would not nest there. During the same time Dan and his friends were staining the railing pieces. 12 2x4's and over 100 2x2 banisters. | ||
| The outside overhang completely enclosed | 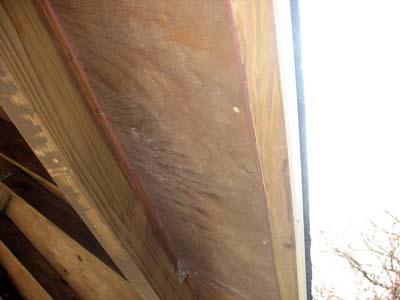 |
|
 |
The city wanted the interior opening to the overhang also enclosed so birds could not nest there. | |
| This is all of the scrap that was left after construction of the gazebo. | 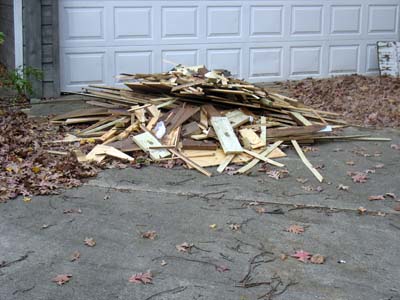 |
|
 |
The railings were measured and pre cut. Each railing was then built and they were taken to the gazebo to be installed. | |
| Steve unloads one of the railings |  |
|
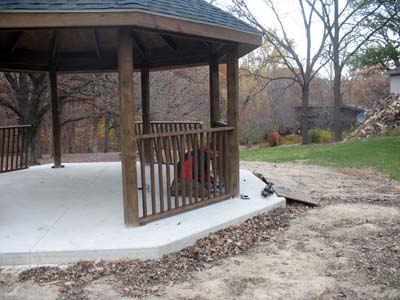 |
Dan attaches one of the railings | |
| 2 railings in place | 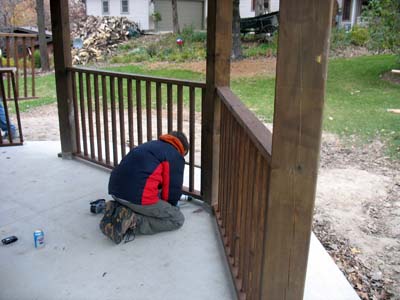 |
|
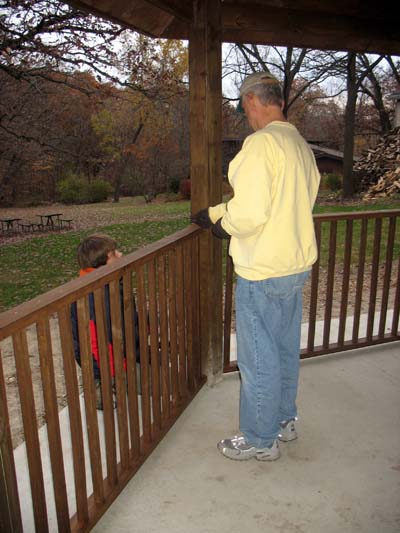 |
Steve holds the railing as Dan puts in the screws to hold it in place. | |
| Steve watches closely as Dan finishes | 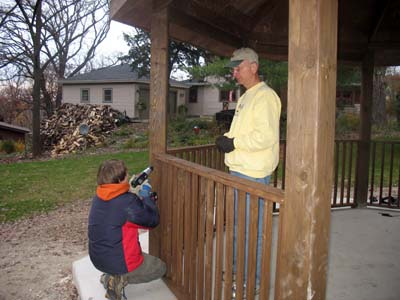 |
|
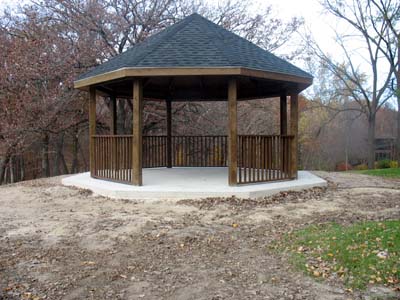 |
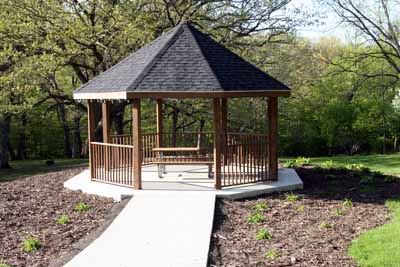
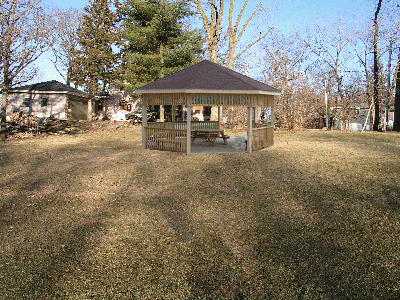
The finished Gazebo from the front. | |
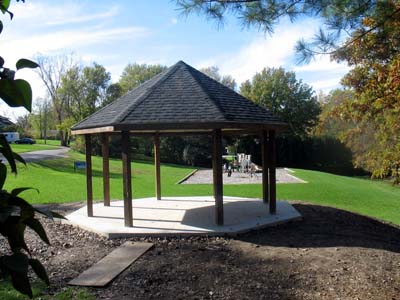
| The finished Gazebo from the east. | 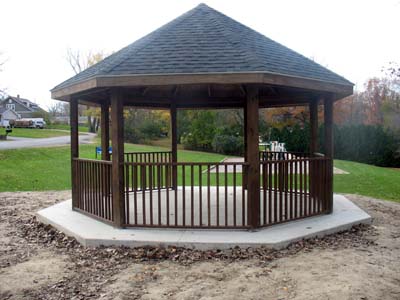 |
|
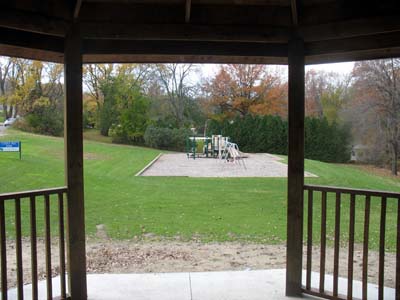 |
Looking toward the playground from inside the Gazebo. | |
| Dan with his finished Eagle Project. | 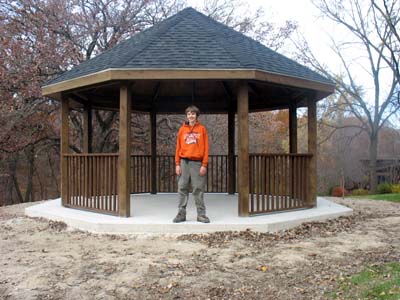 |
|
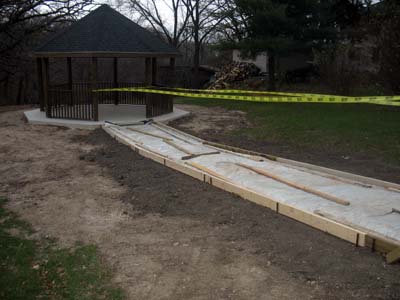 |
The city laying the forms for the sidewalk | |
| One of our neighbors put up lights on the gazebo. Dan and Sam start to put up a wreath | 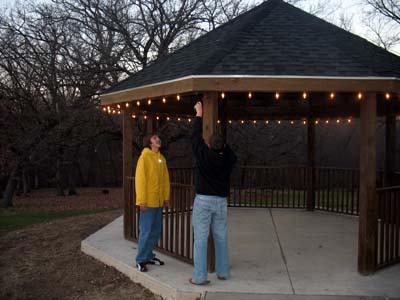 |
|
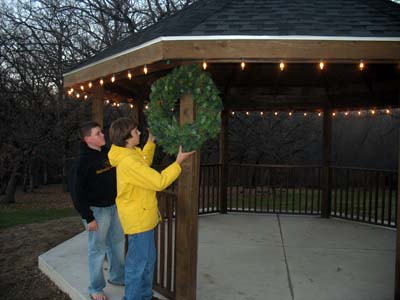 |
With the wreath in place | |
| Still needs one more wreath on the east side. | 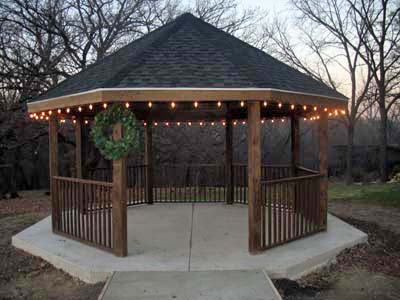 |
|
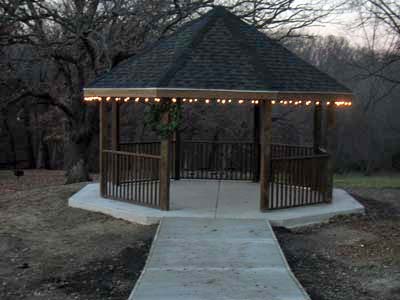 |
The finished Gazebo with the wreath, lights and the sidewalk. Next spring, the city will finish the landscaping. | |
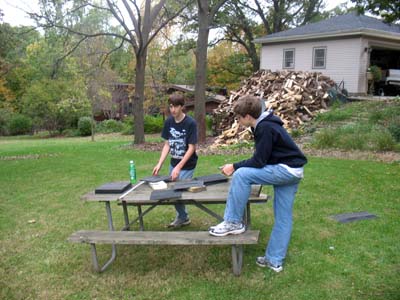
| The picnic tables before |  |
|
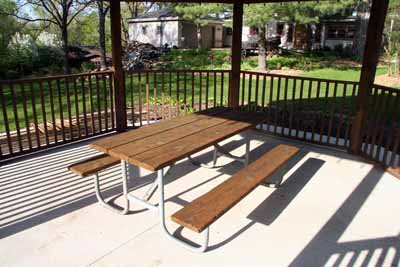 |
After power washing, staining and sealing, they look much better. One table was placed inside the gazebo. | |
| The other was placed by the swingset. | 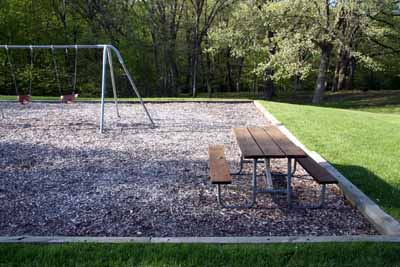 |
|
 |
Landscaping has started. Mulch has been added. Daylilies along the sidewalk. | |
| Hostas are on the shaded side and more daylilies will be on the other side. | 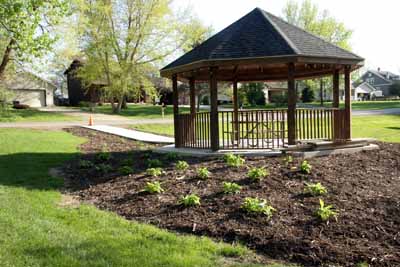 |
|
|
How did his original plan compare to the final Gazebo? On the left is the original photoshop picture and on the right is the final project. | ||
 |
| |
|
View from the west
| ||
 |
| |
|
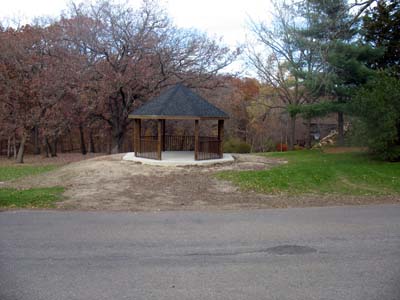
View of the Gazebo from the road
| ||
|
Without all of the help from scouts, scouters and other friends, this project would not have been possible. | ||
|
The next steps will be for the city to finish the landscaping. We were hoping to have them put in
a gravel parking lot in front of the gazebo, but city guidelines state that new parking lots must be concrete or blacktop instead of a cheaper
crushed rock. Maybe if the neighborhood asks the city council? | ||